
Outdoor Projects
Build This Outdoor Bench in a Weekend (Full Cut List)
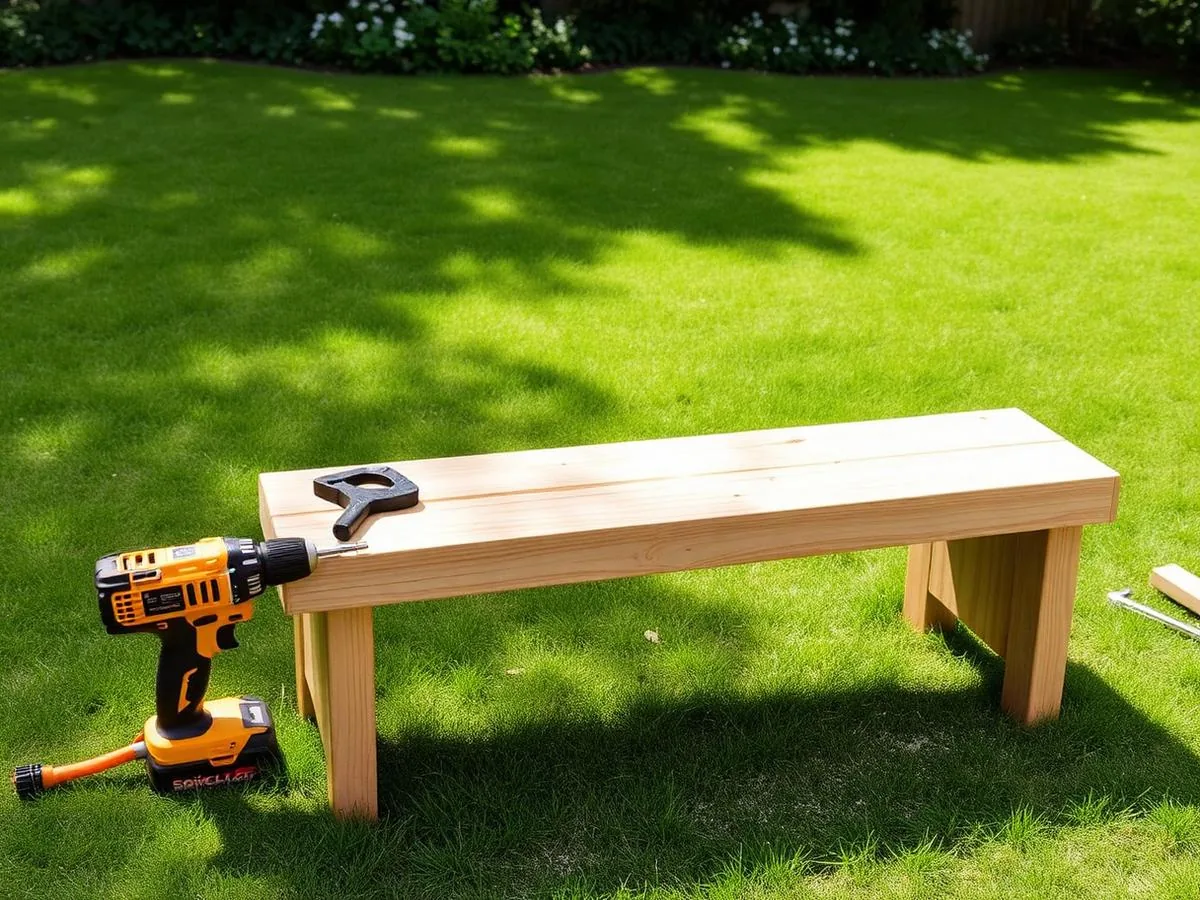
A sturdy, good-looking cedar bench you can build in a weekend with basic tools, plus the exact cut list and hardware you'll need.
Why this bench is a great weekend project
If you've never tackled an outdoor furniture build before, this bench is the project we'd point you toward. It uses straightforward joinery, standard lumber dimensions, and a small tool list, but the finished piece looks like something you'd pay $400 or more for at a garden center. In our testing, a first-time builder with a circular saw and drill can finish it comfortably in one Saturday and Sunday.
The design seats two to three adults comfortably at 48 inches wide, and the slatted seat and back let rainwater drain instead of pool, which matters a lot for longevity outdoors. We built ours from cedar because it resists rot and insects without chemical treatment, but the same cut list works with pressure-treated pine or redwood if that's what's available locally.
Total material cost typically lands between $110 and $180 depending on lumber prices in your area and whether you already own basic hardware like exterior screws. That's a fraction of comparable retail benches, and you end up with a piece built to your exact dimensions and finish preference.
Tools and materials you'll need
You don't need a full woodshop for this build. A circular saw or miter saw, a drill/driver, a speed square, clamps, and a tape measure will get you through every cut and joint. A random orbital sander speeds up finishing but isn't strictly required if you're patient with sandpaper by hand.
- Circular saw or miter saw with a sharp blade
- Cordless drill/driver with countersink bit
- Speed square and tape measure
- 4-6 bar or pipe clamps
- Random orbital sander (120- and 220-grit discs)
- Exterior wood glue
- 2.5-inch and 1.25-inch exterior-rated screws
- Exterior wood finish (oil or spar urethane)
Full cut list
This cut list produces a bench roughly 48 inches wide, 24 inches deep, and 34 inches tall including the backrest. Buy cedar in 8-foot and 10-foot lengths to minimize waste — the table below maps each part to standard lumber sizes.
| Part | Quantity | Lumber size | Cut length |
|---|---|---|---|
| Legs | 4 | 4x4 | 17.5 in |
| Seat slats | 6 | 2x4 | 48 in |
| Backrest slats | 3 | 2x4 | 48 in |
| Front/back aprons | 2 | 2x4 | 45 in |
| Side aprons | 2 | 2x4 | 21 in |
| Back support posts | 2 | 2x4 | 16 in |
| Diagonal armrest supports | 2 | 2x6 | 22 in |
Step-by-step build instructions
Work through these steps in order. Dry-fit every joint before adding glue and screws so you can catch measurement errors while they're easy to fix. None of these steps require specialty joinery skills, just patience and careful measuring.
- 1
Cut all lumber to size
Using the cut list above, cut every piece and label it with painter's tape so you're not second-guessing part identity during assembly.
- 2
Build the two leg-and-apron end frames
Attach the side aprons between pairs of legs using glue and 2.5-inch screws driven through pre-drilled countersunk holes, keeping everything square with a speed square.
- 3
Connect the end frames with front and back aprons
Clamp the front and back aprons to the leg assemblies, check for square by measuring diagonals, then glue and screw.
- 4
Attach the seat slats
Space the six seat slats evenly across the apron frame with 1/4-inch gaps for drainage, screwing each slat down from above with countersunk screws.
- 5
Install back support posts and backrest
Screw the back support posts to the rear legs, then attach the three backrest slats to the posts at a slight recline for comfort.
- 6
Add diagonal armrest supports
Cut the 2x6 supports at an angled profile and fasten them between the front legs and the back support posts to brace the backrest.
- 7
Sand, fill, and finish
Sand all surfaces starting at 120-grit and finishing at 220-grit, ease sharp edges, then apply two coats of exterior finish, letting each coat dry fully.
Joinery options and hardware choices
You can build this bench with pocket-hole joinery, traditional mortise-and-tenon, or simple butt joints reinforced with exterior screws and glue, as we did. For a first outdoor furniture build, screwed butt joints are the most forgiving and still hold up for years when paired with quality exterior-rated hardware.
When pocket holes make sense
If you own a pocket-hole jig, it hides fasteners and speeds up assembly, which is nice for the aprons and backrest connections. The tradeoff is that pocket screws alone are weaker in outdoor conditions than screws paired with exterior glue, so we still recommend gluing every joint regardless of which screw method you choose.
Choosing the right screws
Always use exterior-rated fasteners — stainless steel, hot-dipped galvanized, or coated deck screws. Standard interior screws will rust and stain the wood within a season, leaving unsightly streaks and weakened joints.
Finishing options compared
The finish you choose affects both appearance and how often you'll need to maintain the bench. Here's how the three most common outdoor wood finishes stack up for this kind of project.
| Finish type | Cost | Reapplication | Look |
|---|---|---|---|
| Penetrating oil | $ | Every 6-12 months | Natural, matte |
| Spar urethane | $$ | Every 12-18 months | Glossy, protective film |
| Exterior stain | $ | Every 1-2 years | Tinted, semi-transparent |
Common mistakes to avoid
Most build problems come down to skipping the dry-fit stage or rushing the squaring process. A bench that's slightly out of square when the frame goes together will wobble no matter how well you finish it later.
- Skipping pre-drilling and splitting the wood near screw locations
- Not checking for square before the glue sets
- Leaving no drainage gap between seat slats
- Using interior screws or hardware that will rust
- Applying finish before the wood has fully dried after acclimation
- Overtightening clamps and bowing thinner boards
Maintenance to keep it looking great
A little seasonal upkeep goes a long way. Rinse the bench with a hose a few times a season to remove dirt and pollen, and check fasteners once a year for any that have loosened or started to corrode.
In climates with harsh winters, store the bench in a garage or shed, or at minimum cover it with a breathable outdoor furniture cover. Trapped moisture under plastic tarps causes more damage than leaving wood exposed to open air.
The bottom line
This bench proves you don't need advanced woodworking skills or a garage full of tools to build outdoor furniture that looks custom and lasts for years. Follow the cut list, take your time squaring each joint, and finish it properly, and you'll have a piece your family uses every summer for a fraction of retail cost.
Once you're comfortable with this build, the same techniques scale up to matching side tables, planter boxes, or a longer bench for a dining set. Save your offcuts — they're often just the right size for a future accessory project.
Keep reading
Sources
- #woodworking
- #bench
- #beginner
- #cedar
Frequently Asked Questions
How long does this bench actually take to build?
Most first-time builders finish in 10-14 hours spread across a weekend: roughly half a day for cutting and dry-fitting, half a day for assembly, and a few hours for sanding and finishing. Experienced woodworkers can often finish in a single long day.
Can I use pressure-treated lumber instead of cedar?
Yes. Pressure-treated pine is cheaper and holds up well outdoors, though it's heavier and typically needs a season to dry before finishing. Cedar costs more but resists rot naturally and takes stain more evenly right away.
Do I need a table saw for this project?
No. Every cut in this plan is a straight crosscut that a circular saw or miter saw handles well. A table saw makes ripping boards to width faster, but it isn't required for the dimensions in this cut list.
How much weight can the bench hold?
Built as specified with 4x4 legs and screwed-and-glued joints, this bench comfortably supports 500-600 pounds distributed across the seat, which covers three adults sitting together. Avoid standing on the backrest or armrests.
What finish lasts longest outdoors?
In our testing, a marine-grade spar urethane held up longest against sun and rain, typically needing a fresh coat every 12-18 months. Penetrating oil finishes are easier to reapply but need refreshing twice a year in sunny climates.
Can I add cushions to this design?
Yes. The 48-inch by 24-inch seat area accommodates standard bench cushions or two chair cushions side by side. Choose outdoor-rated fabric with a water-resistant fill so cushions don't hold moisture against the wood.
Related Articles

Vegetable Garden Failures: How to Fix Common Problems
Discover how to diagnose and resolve common vegetable garden challenges using practical, science-based troubleshooting techniques to save your plants.
High Yield Vegetable Gardening: Advanced Methods for Success
Take your harvest to the next level by implementing intensive planting strategies, precision nutrient management, and data-driven garden planning techniques.

Automated Garden Tools for Beginners: A Complete Guide
Learn how to use smart technology to streamline your gardening chores without losing the joy of working in the soil. This guide covers the basics of garden automation for beginners.